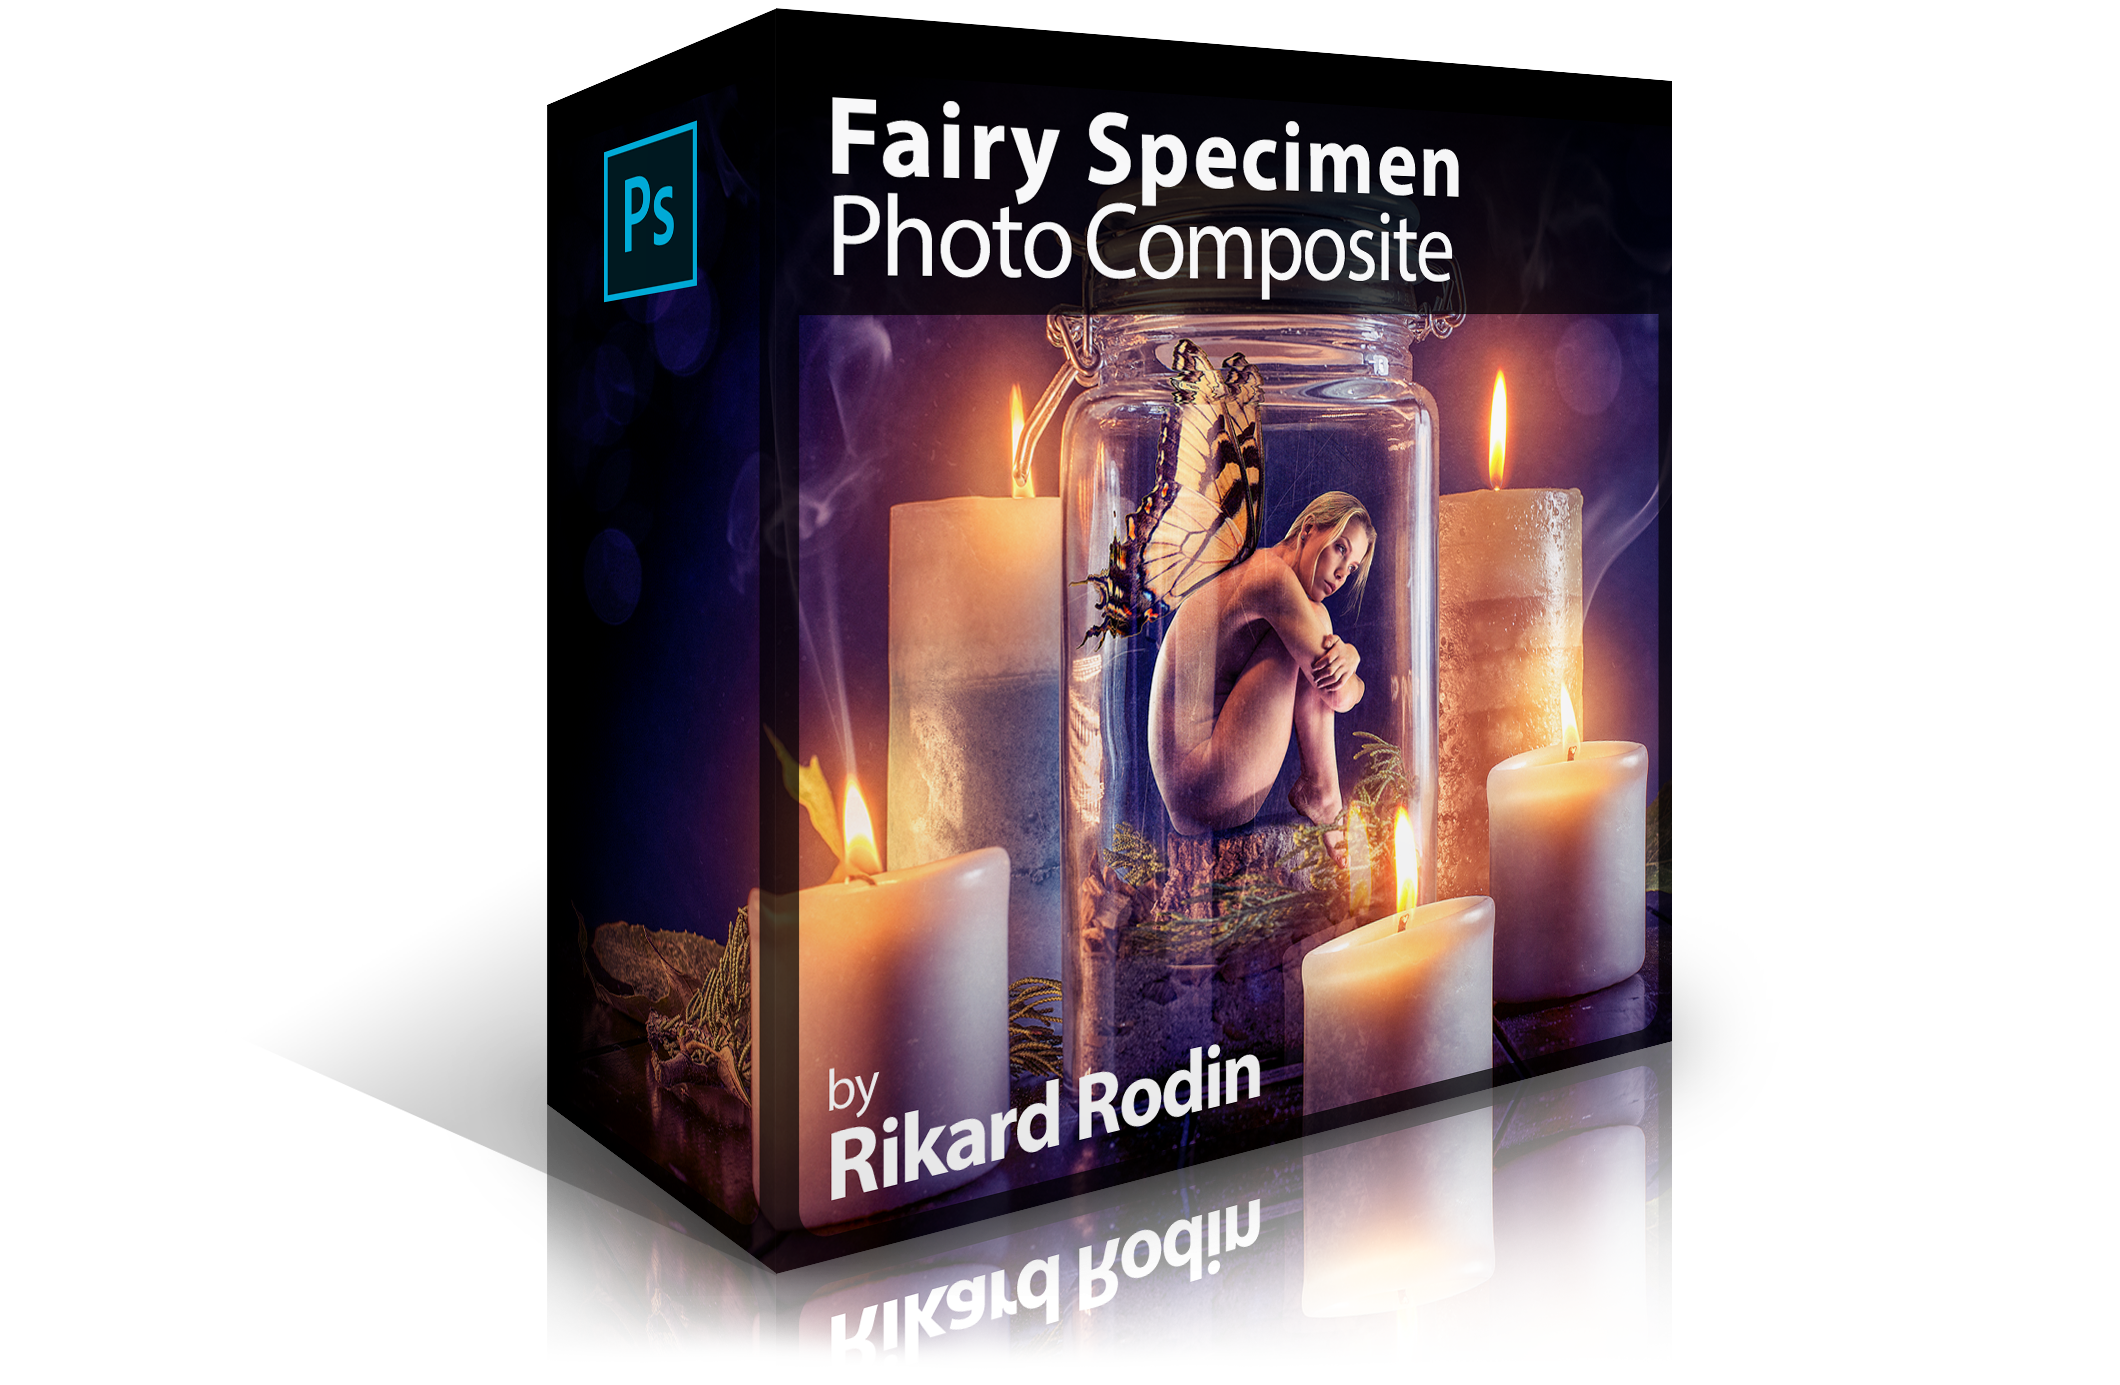
Fairy Specimen Photo Composite
In his longest course so far, our guest instructor—Creative Director and Photoshop Guru Rikard Rodin—will take you through the full workflow of creating a fairy in a mason jar composite. Here you’ll learn numerous selection methods, free transform, the displace tool, frequency separation and much more. As each tool is used, you will also learn the shortcuts so that you can become a master at Photoshop.
Length: 2 hours, 5 minutes | Experience Level: Beginner to Intermediate | Required Software: Photoshop CC
[purchase_link id="3817" text="Purchase" style="button" color="white"]
Before
After
Lessons

Lesson 1: Photoshop 101
Learn the most used shortcuts in Photoshop—and the shortcuts that will drastically speed up your photoshop compositing.
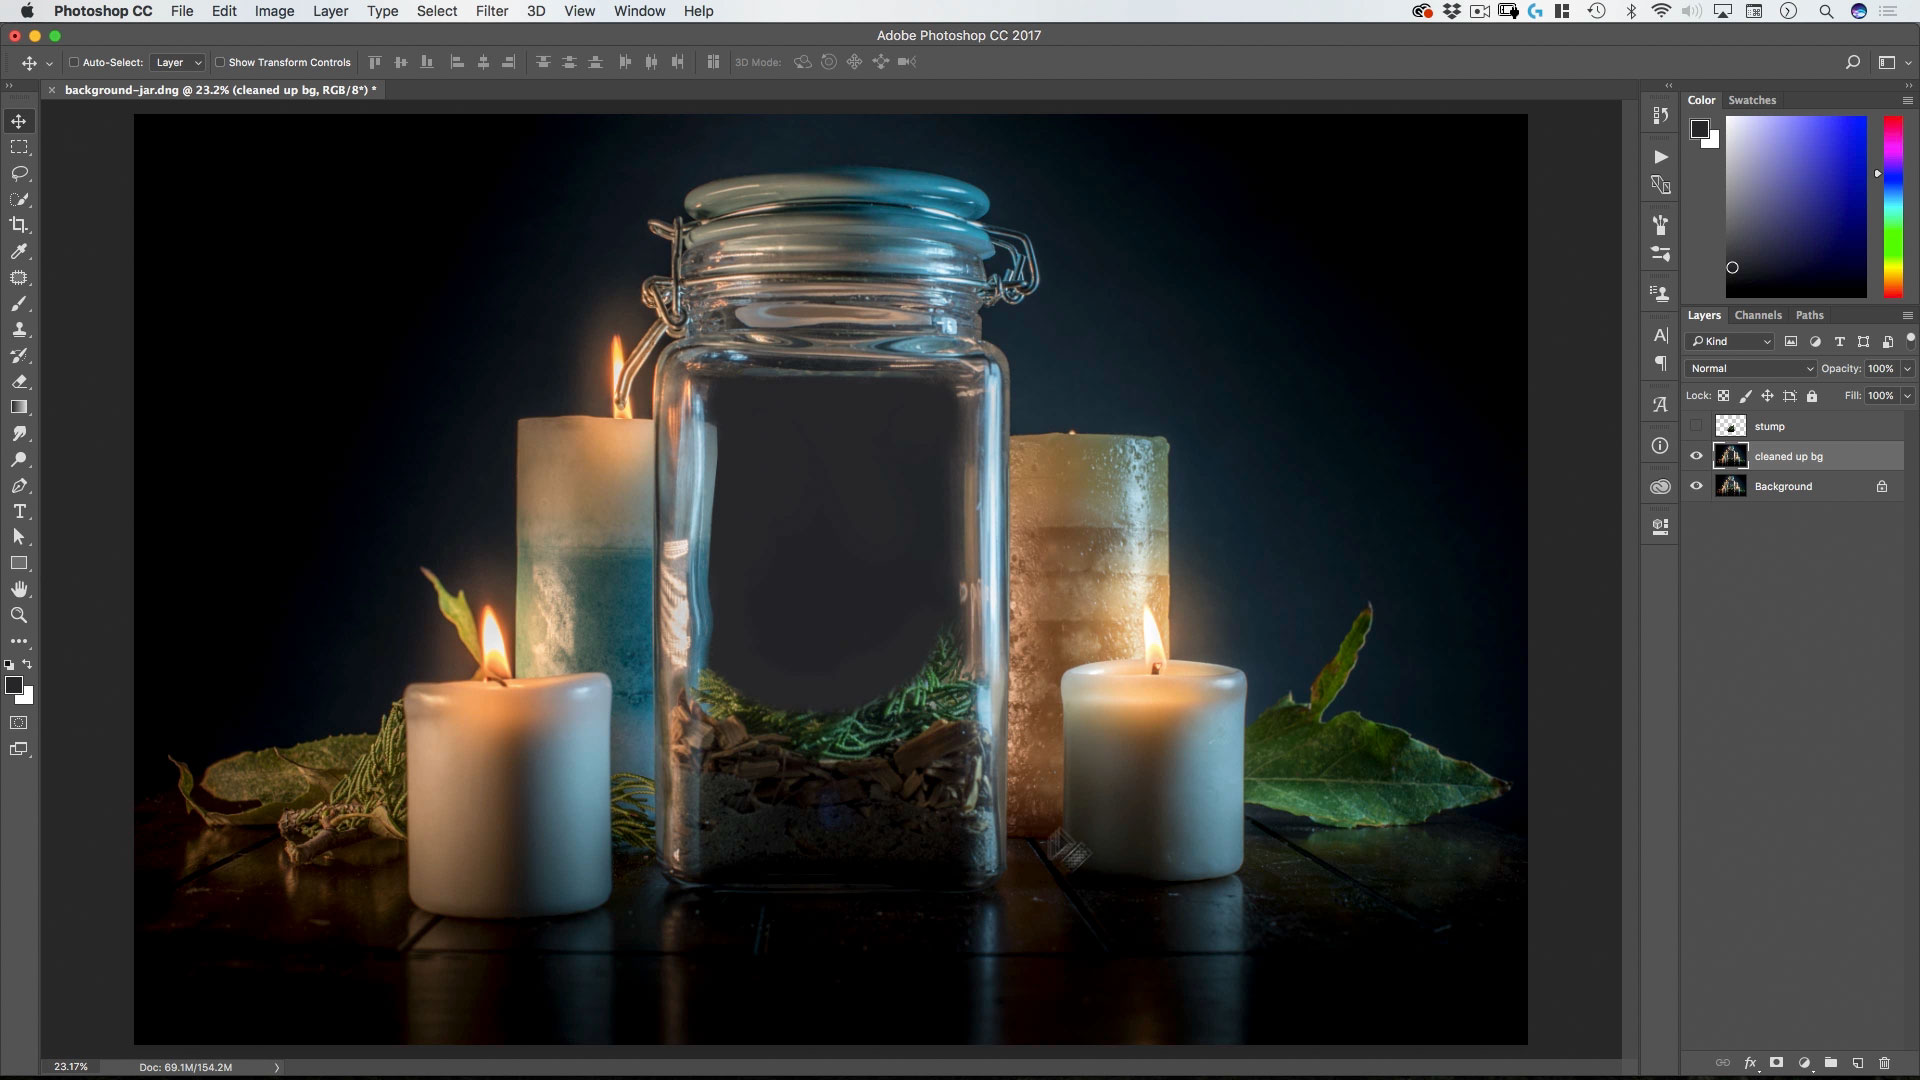
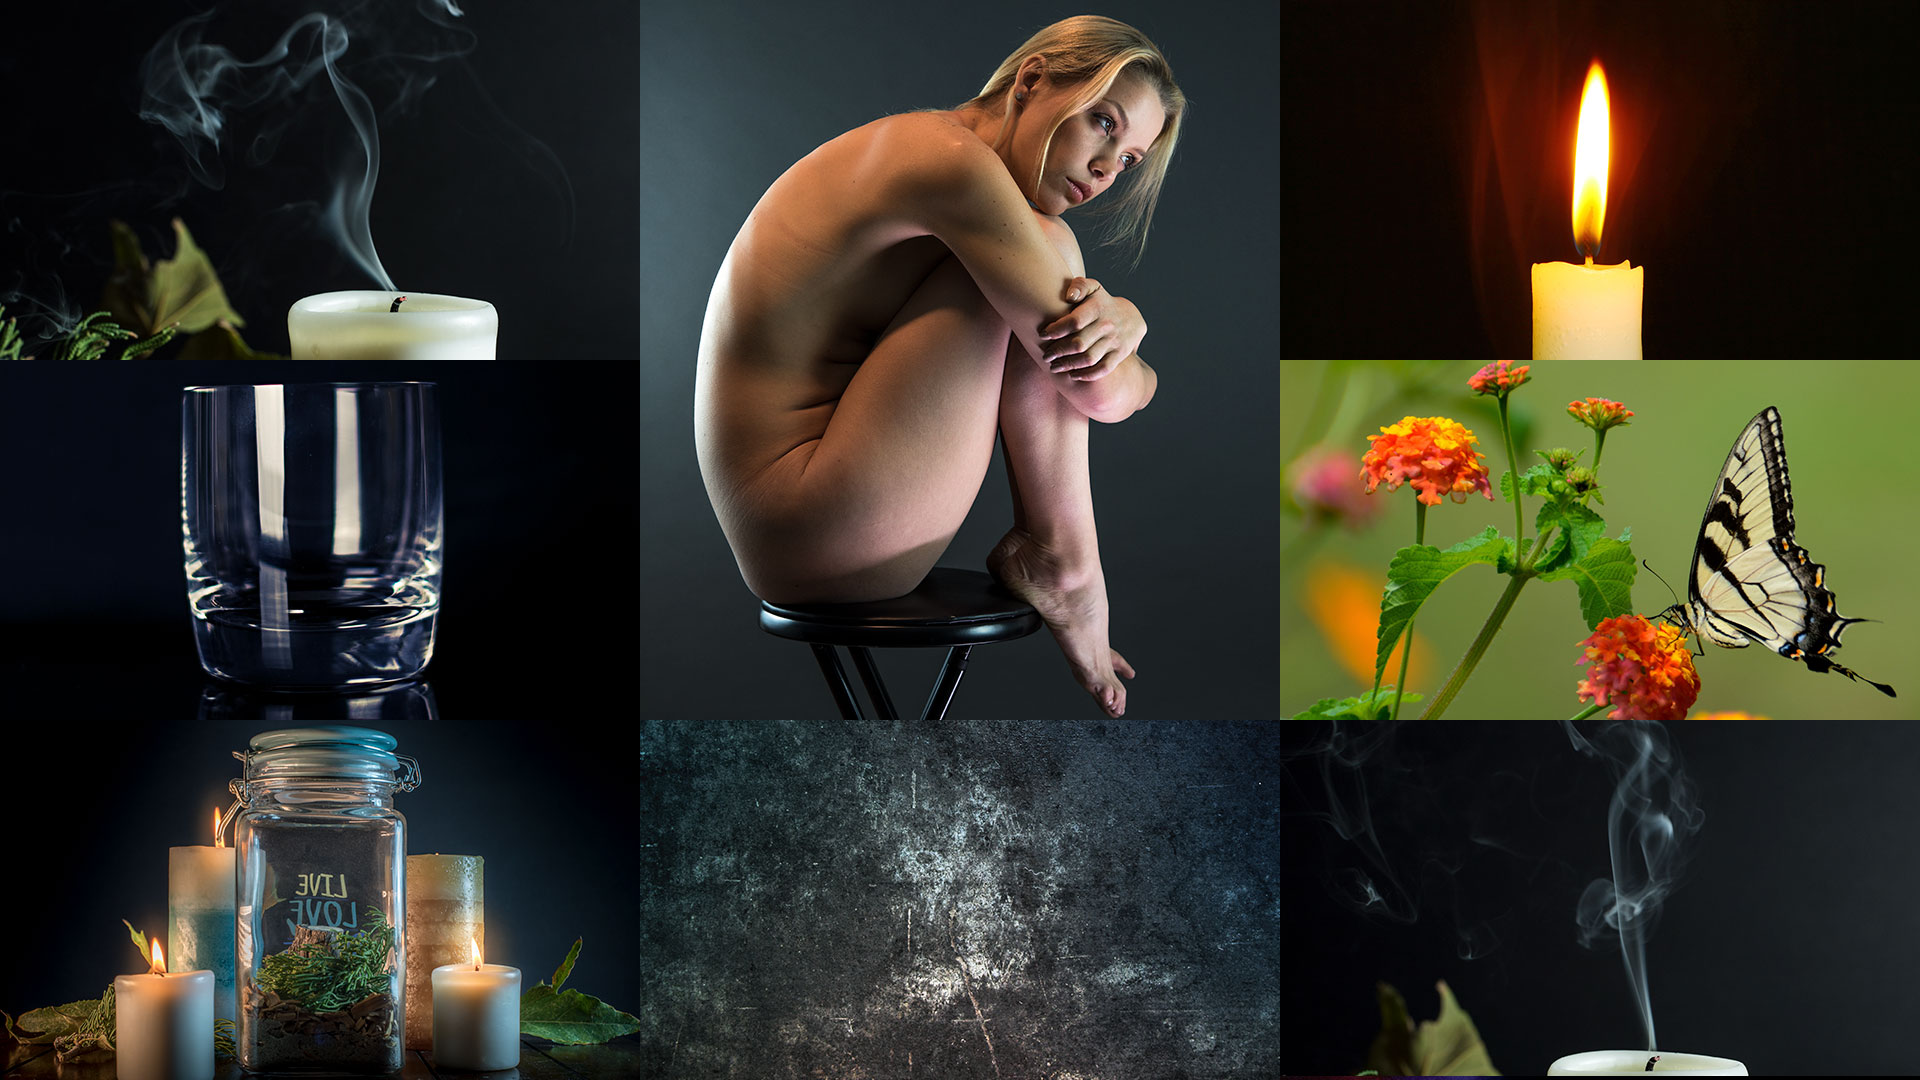
Lesson 2: The Background
Learn how to remove objects in photoshop and recreate backgrounds from existing elements.
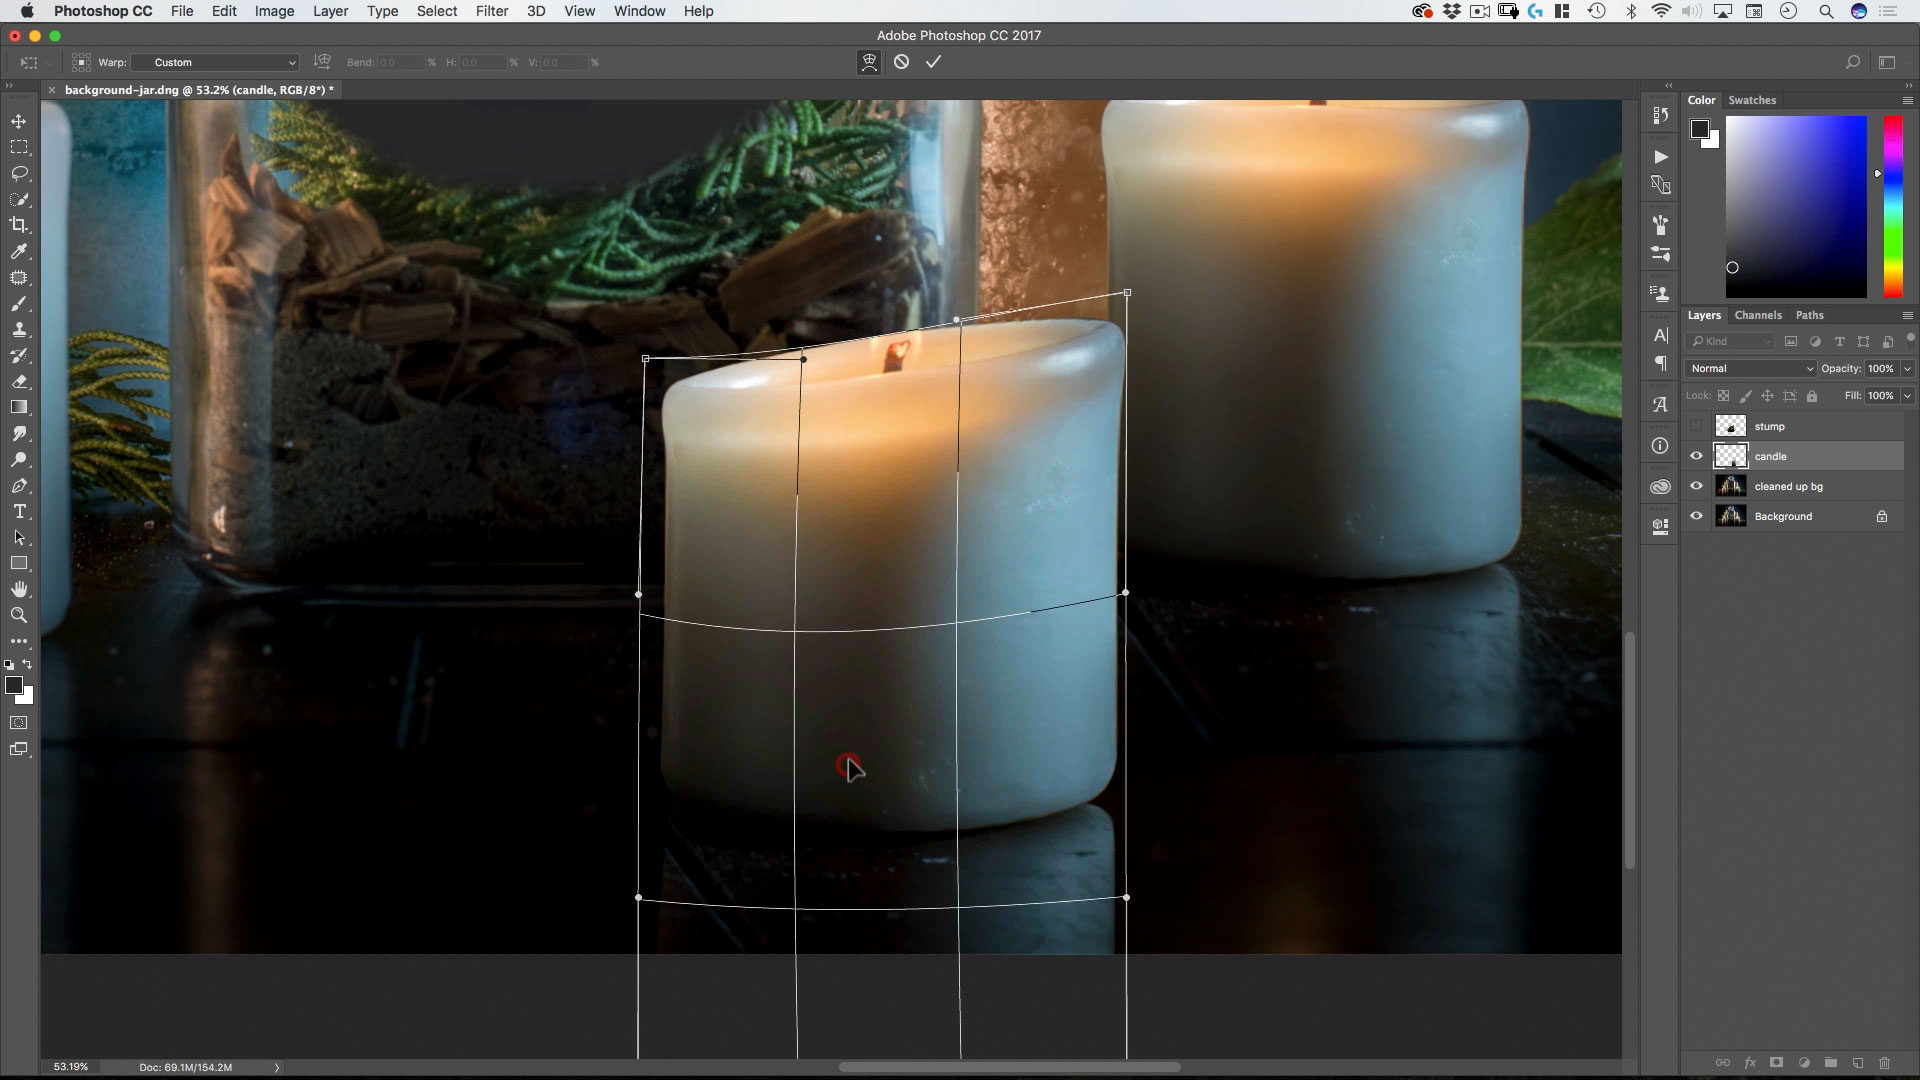
Lesson 3: Adding a Candle
Selections with paths, free transform, warp and more—here we add the foreground candle into the scene.

Lesson 4: Frequency Separation
The most effective—and fast—method for skin retouching covered from top to bottom.

Lesson 5: Fairy into the Jar
Here you’ll learn how to cut someone out of a background, including hair, for realistic compositing.
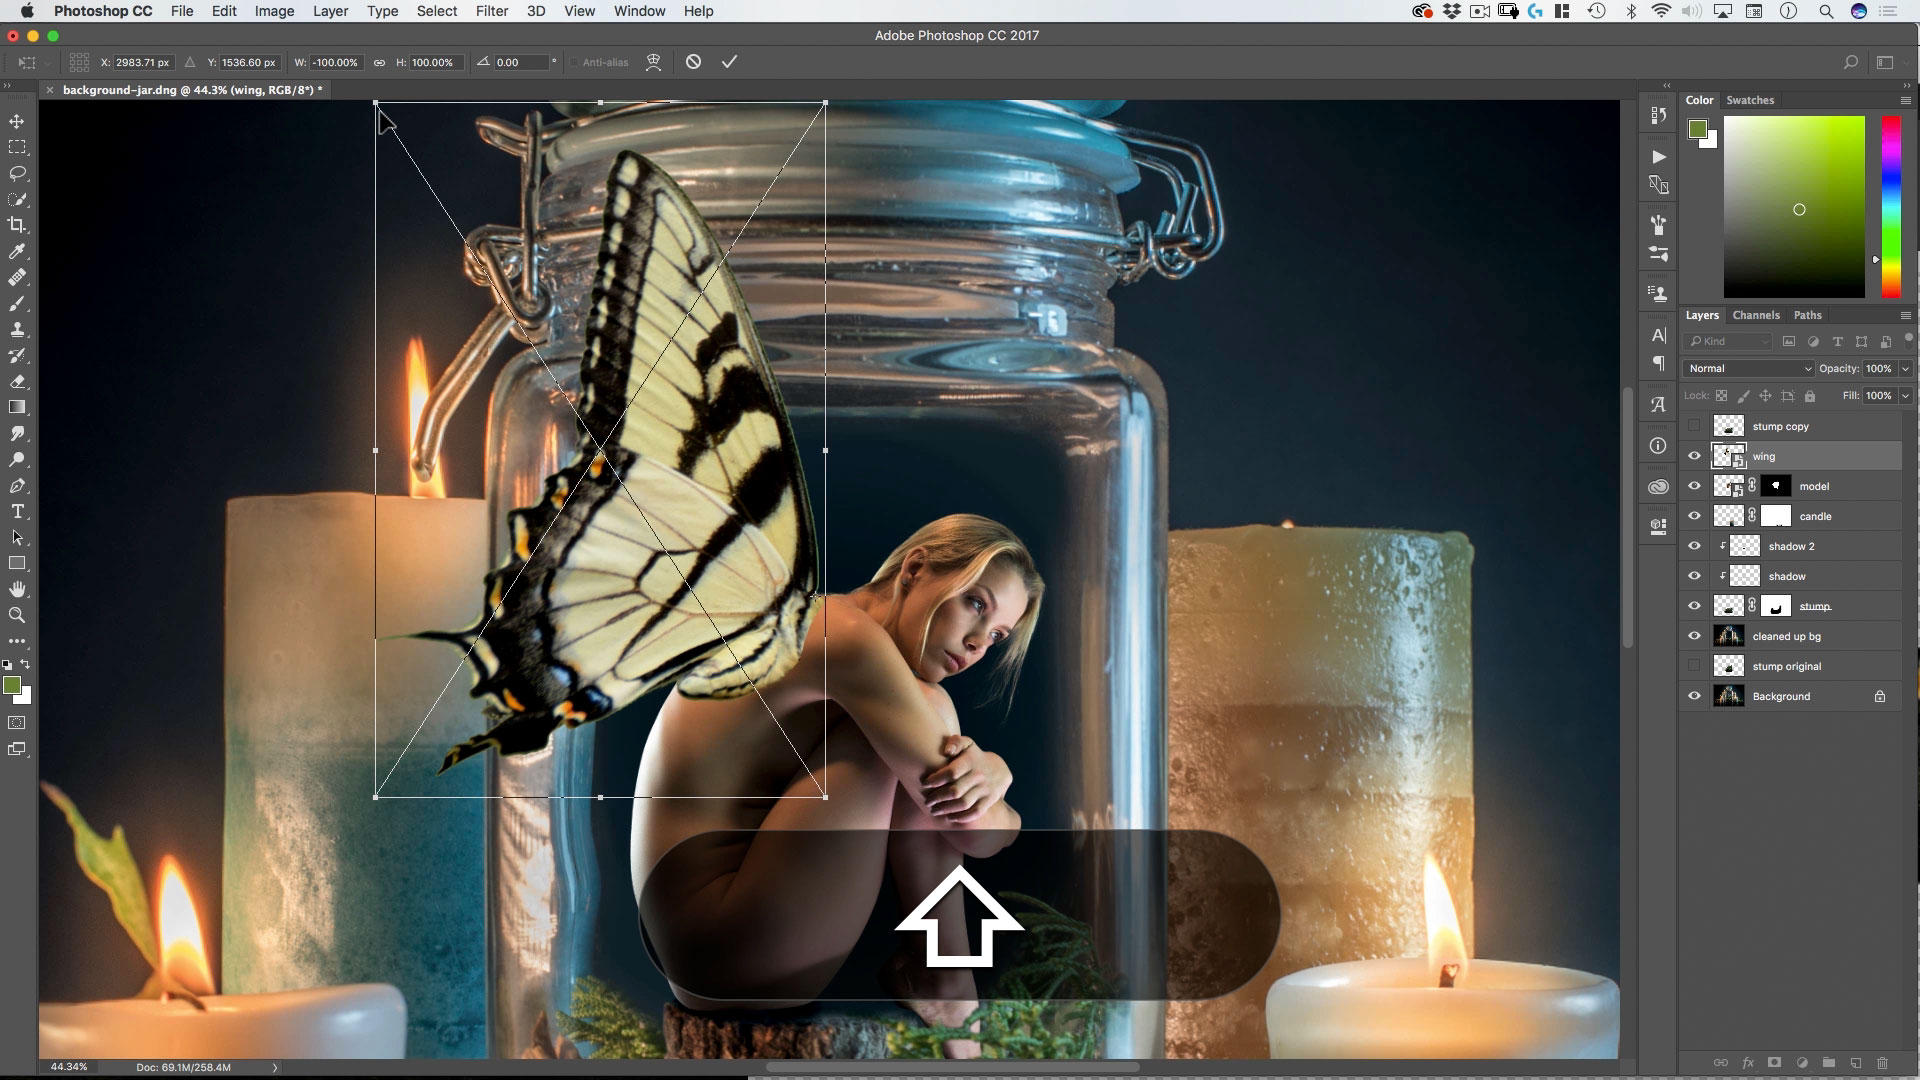
Lesson 6: Giving Her Wings
Learn how to use the color range selection tool and how to transform, add shadows and manipulate the wings into the scene.
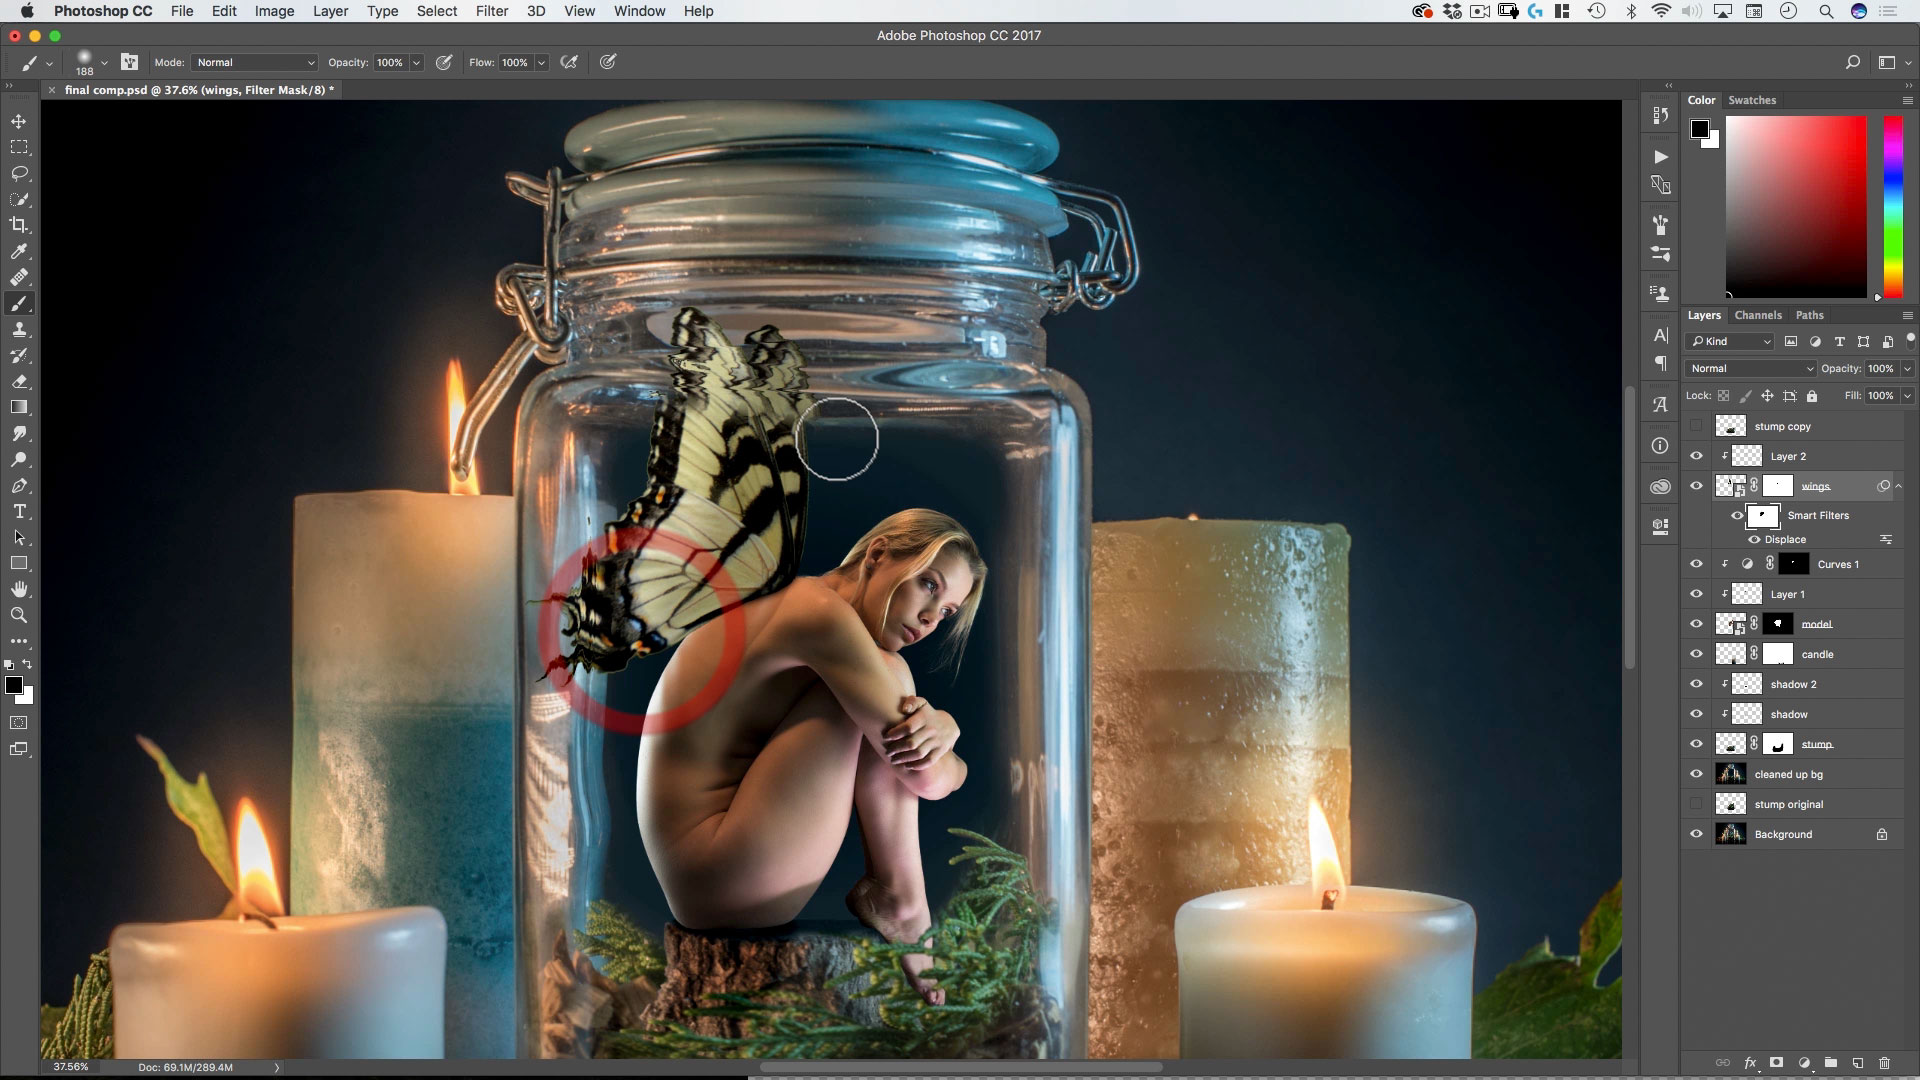
Lesson 7: Into the Glass
How to use the displace tool to create realistic glass distortion—and how to use blending modes to add reflections on top of an image.

Lesson 8: Flame & Smoke
Go further with blending modes and masking to realistically add flame and smoke into the composite.
Lesson 9: Texture
How to add scratches, grunge and dust to an image to create more realistic final composite.

Lesson 10: Color Grading
How to use a single gradient map adjustment layer to color grade an image and how to use Camera Raw to give the whole composite a kick.
Each lesson video is provided in HD along with the art and graphic assets used in each lesson. Videos can be downloaded and viewed on any device or on any computer. After you’ve completed the course, you can email your completed photo composites (as flattened jpgs) to rikard@zevendesign.com for free reviews, critiques and tips to further increase your skill.
[purchase_link id="3817" text="Purchase" style="button" color="white"]
Check out my other available courses