Everything you need to know to start using embossing in your design projects and appear to know what the hell you’re doing.
Embossing is simply raising the surface of your design so that it has some depth. It’s the real world equivalent to bevel effects and likely derives from relief sculptures—resembling most closely the bas-relief where the depth is perceived as a lot more than is actually there. The word itself is old French, coming from em (into) and boce (protuberance).
As for how it relates to graphic design—embossing has been used as a finish for high end printed products for hundreds of years. It’s a great way to give your design another dimension that print simply cannot do. Emboss can be used by itself or together with foil, coatings or printing.
How it’s Done
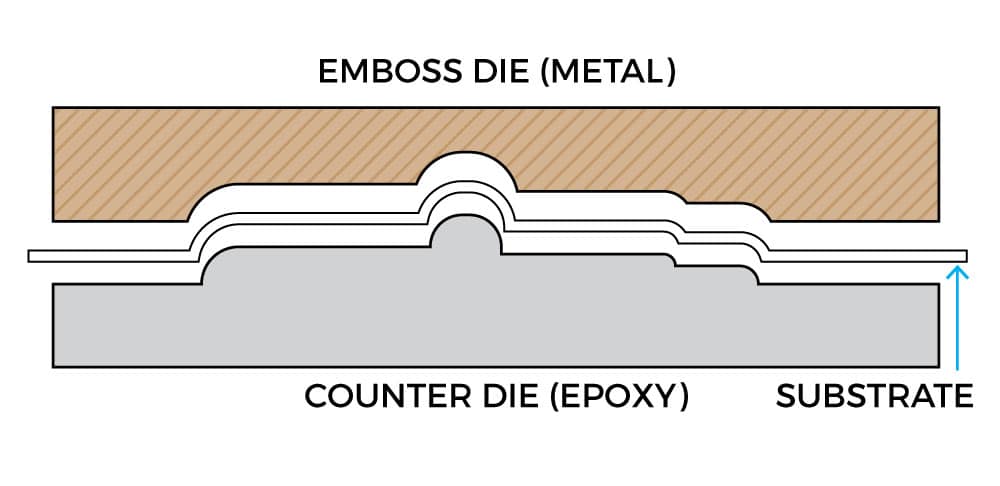
Embossing is done by pressing a sheet of paper (or other substrate) into a female die, that has a design engraved or etched into it. This is usually done with a male counterpart underneath the paper, so that the paper is sandwiched between the two and the design is transferred to the paper.
Although embossing seems to be quite deep visually, it is commonly no more than 15 microns and at most, 25 microns. That’s 25 thousands of an inch. Your average emboss is about 1/64th of an inch. You can see in this photo how the depth of an emboss die affects the appearance of the final piece. Note that as the depth of the die increases, there’s a higher chance of the paper tearing (as can be seen in the “D” of “guide”).

While embossing technically refers to a raised surface, embossing can also be done to create a depressed design in a surface. In the graphic design and printing industry, this is usually referred to as “deboss.” For a deboss, the male and female dies are switched so that the topside (front) of the sheet is pressed with the male die and the female die sits underneath it. When a deboss is registered to printing, one can create the appearance of engraving.
For the most part, presses that do embossing are interchangeable with presses that do foiling. Both processes require a lot of pressure and, for certain effects, a heated plate. Moreover, foiling and embossing are most often done together and so it makes sense to have a machine that can handle both.
The most common presses are:
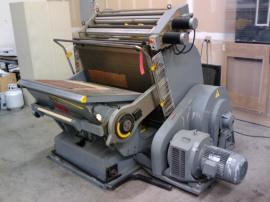
- Clamshell press: This press closes like a clam, sandwiching the paper between the male and female die. This type of machine typically has a small footprint with a lot of pressure. It is also easy to switch dies and change your set-up (make-ready), making it a good option for small runs. If you’re around foiling and embossing long enough you’re bound to hear Kluge. This is the most popular clamshell stamping press and is almost synonymous with clamshell hot stamping press.
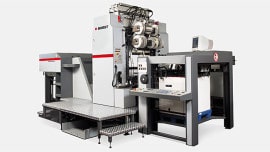
- Straight stamp press: Bobst, Thermotype, Kensoll-Franklin and other brands are straight stamp presses. The die comes straight down with paper being fed in and out of the stamp area. Because of the straight path of the paper, these are faster than clamshell presses. But typically, the set up time is longer. For long runs, these are better than clamshells.
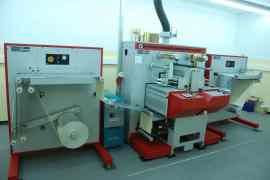
- Roll press: A roll press is similar to an offset printer, except instead of using ink plates, it uses dies. This press uses a die mounted on a roller. Paper, either on a roller or in sheets, is fed through and impressions are rolled onto the design. This is the fastest of the three press types, but the dies are far more expensive and the set up time is far longer. So really, this method is used for things that have huge (in the hundreds of thousands or millions) run quantities.
Dies & Types of Embossing
We mentioned dies above. Dies are the metal plates that have the impression to be embossed engraved or etched out of them. Die can also refer to the male counterpart to the female emboss die, however these are usually referred to as counterdie (for plastic and metal) and make-ready for paper.
Dies are the “master” for any embossing and thus dictate in large part the kind of emboss you will get.
These are the most common types of embossing dies (note that dies are made of metal and that not all metals are created equal—metals most commonly used for emboss dies are magnesium, copper, bronze and steel—covered further below):
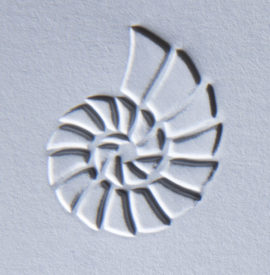
Single level die
Single-level die: An embossing or debossing die that changes the surface of the paper at one level. This is both the most common and the cheapest of all embossing dies. The process for creating the die is identical to creating a foil die except that the image is inverted. Single level dies are made usually from magnesium or copper. A magnesium die can be half the price of copper, but caps out at somewhere between 5 and 10 thousand impressions. Moreover, a magnesium die can be destroyed with a single misfeed in the stamping machine. Copper dies are stronger than magnesium and will last for far more impressions.
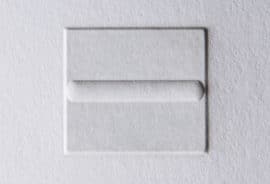
Multi-level emboss
Multilevel die: A die with a number of distinctive levels. It can be engraved by machine and does not require hand-tooling. Multilevel dies are often made of brass. An example of a multilevel emboss is designs that have a “texture” in the background.
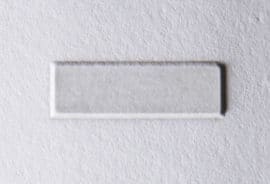
Bevel edge emboss
Bevel-edge die: Similar to a single level die, but with a precise bevel on the image edge, usually between 30 and 60 degrees. The broader the angle, the greater the illusion of depth. Very deep dies must have beveled edges to prevent cutting through the paper.
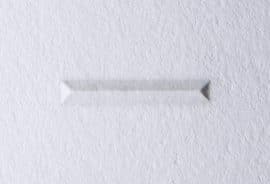
Chisel (roof) emboss
Chisel die: An embossing or debossing die with a V-shape, using two bevels without a flat bottom surface. It is most frequently used in debossing. It’s also sometimes referred to as a “roof” die.
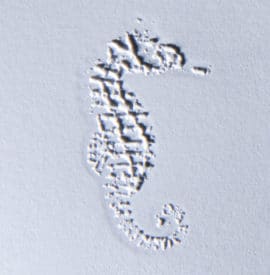
Textured die
Textured die: An embossing die with an etched texture. Although this might look similar to a sculpted die, it isn’t. It is essentially a single level emboss die with very detailed artwork. These work best for artwork that don’t depend on the detail to look refined. Organic patterns, skin textures and other single level textures can be done with a textured die.
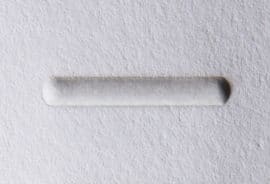
Dome emboss die
Rounded die (domed die): An embossing die that imparts a rounded configuration to an embossed image. It is commonly used for logos and typographical effects.
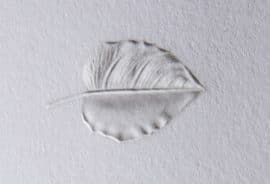
Sculpted emboss die
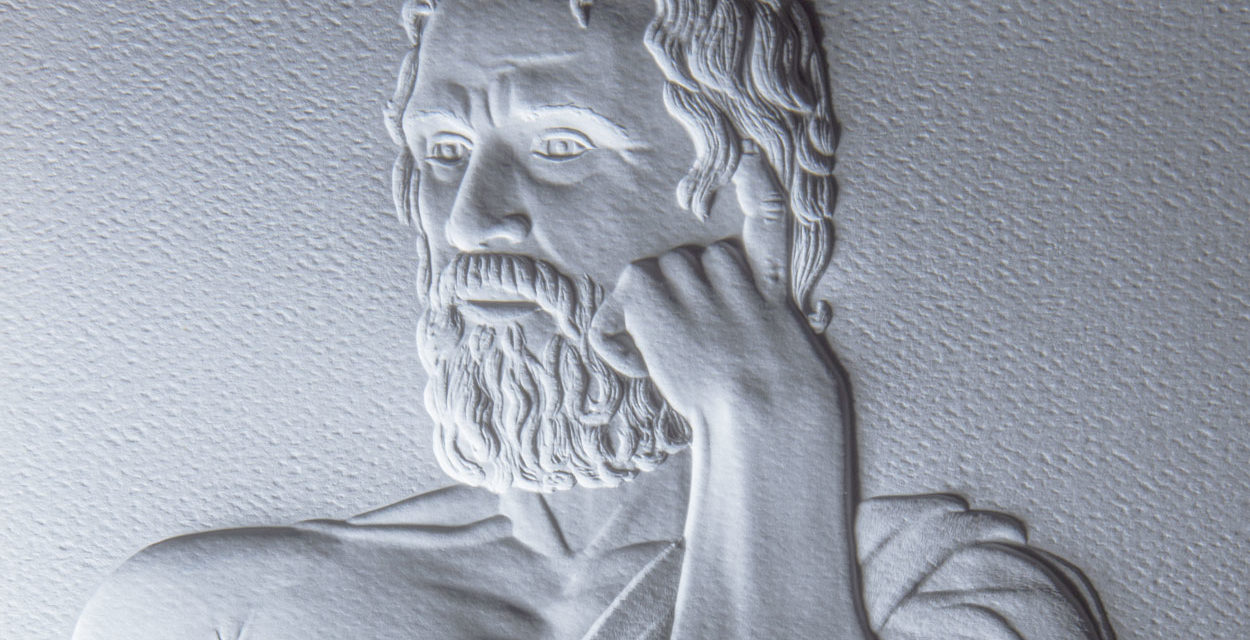
Sculptured die: A hand-tooled die, usually made of brass, that embosses many levels through the use of curves, angles, and varying depths. These dies are the most expensive as they require someone to hand sculpt the die based on image references provided (these images usually being transferred to the metal through a photo-etching acid bath for use as a template). They also have the nicest effect, looking like a bas-relief in paper.
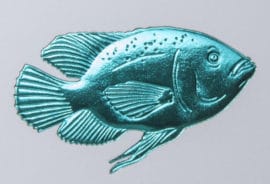
Combination foil emboss die (combo die)
Combination die (foil emboss die): More commonly referred to as a “combo die”—this type of die allows embossing and foil stamping to be accomplished in a single impression. From a design perspective, this means that every part of the design that is being embossed is also being foiled.
Of all these emboss dies, the most important ones to know as a designer are single-level and sculptured (sculpted). Most embossing you see on advertising and marketing products use single-level emboss dies—book covers, brochure covers, business cards, letterhead. The next most common are products that use sculpted dies—higher-end letterhead and business cards, holiday cards and a lot of packaging products. The other dies are far more specialty.
Metals
As mentioned above, different types of dies are made with different metals. The three most common are magnesium, copper and brass. A designer should know the pros and cons of these:
Magnesium: Used for single-level dies. Magnesium is a soft metal and is etched using acid. The process is quite fast, with the etching itself taking only a few minutes. The advantage of magnesium is the cost. It is half the cost of copper and about a quarter the cost of brass. Whereas a small magnesium die might cost $50, the same die made of brass could be well over $300. The disadvantage with magnesium is that it is soft. While die manufacturers will rate a mag die for 10,000 impressions, it often will show wear before then. Moreover, a single jam in a stamping press may permanently ruin the die.
Copper: Like magnesium, copper is used for single-level dies. The advantage it has over magnesium is the fact that it is significantly harder, rated for 100k impressions. It won’t be ruined by a jam in the stamping press. While more expensive than magnesium, it is still significantly cheaper than brass. The disadvantage with copper, like magnesium, is that because it is created using an etching process, it is only usable for a single level emboss.
Brass: Used for multi-level and sculpted dies. Brass is the hardest of the common die metals and will usually last longer than any print run. Brass dies are CNC’ed and are required for multi-level and sculpted dies as well as combination foil-emboss dies. They are two to three times more expensive than copper dies.

For most common emboss applications, copper dies are the best choice. Not significantly more expensive than magnesium dies, they will last longer and won’t be ruined by a paper jam. Magnesium dies are good for prototypes due to their low cost and fast turnaround, but with the right die manufacturer, you will see little difference in the turnaround of a mag die compared to a copper die. Brass dies are a necessity for combo, multi level or sculpted dies and you should generally allow for a few weeks to get the dies made.
Counter Dies & Make-Readies
A counter die (also referred to as “counterforce”) is the male counterpart to the female emboss die. Most die manufacturers will provide you with a counter die when they send you an emboss die. This counter die is made with an epoxy that hardens into what appears to be a translucent hard plastic. These are made by putting epoxy on a thin, fiberglass board and then stamping the emboss die onto it. If you’re dealing with a high quality die manufacturer, they will also machine out any excess material around the design, leaving less chance for contact where it isn’t wanted.
Counter dies can also be made using a paper chipboard-like material called embossing board. In the industry, this is commonly referred to as “yellow board” due to it’s color. You put this in the press, make it slightly damp and then repeatedly stamp it with your emboss die with the heat turned up. The combination of the pressure and the heat drying the dampness in the board gives you a solid counter die that will work for short runs.
The edges of your emboss, especially when using a single-level, photo-etched die, are largely influenced by your counter die. The softer your counter die, the more rounded your edges will be. Conversely, the more solid your counter die (such as the epoxy plastic), the sharper your embossed edges will appear.

A “make-ready” is the composite of all materials that go underneath the emboss die, including the counter die, any base substrate that the counter die is sitting on and any build up on top of the counter die. Because an emboss die is metal, the only control you have during the stamping process is the make-ready. By building it up or shaving it down in certain areas you can deepen, soften or eliminate areas of emboss.
An important thing to know as a designer is that, unlike a foil die, you can control what is embossed through the make-ready. So if you design something and do a press check on the emboss and find one element of the emboss is either not adding anything to the design or actually detracting from it, you can selectively remove the emboss without remaking your die by modifying the make-ready.
Embossing Applications
While a bunch of the above dies indicate what type of embossing you’ll achieve, there’s actually a whole subset of “types of emboss” and it’s important that as a designer you know what these are:
Blind Emboss
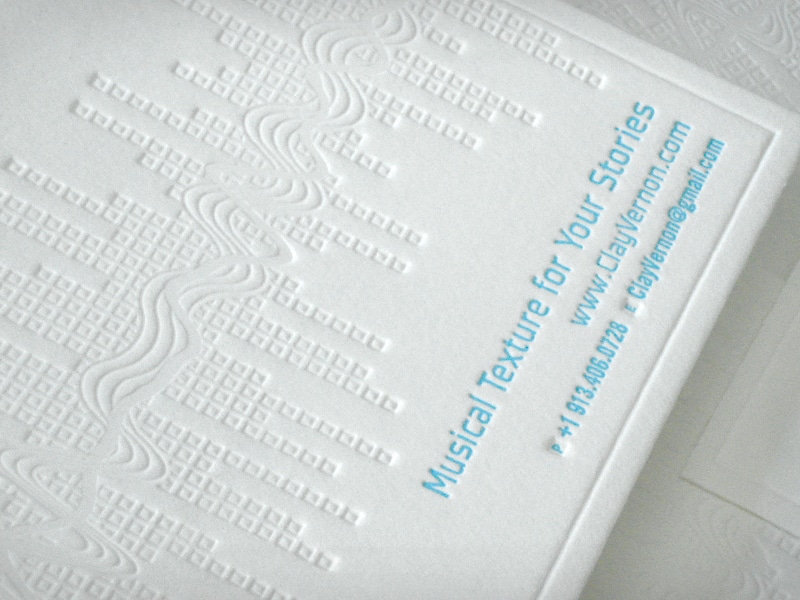
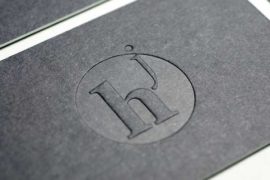
Blind embossing does not include the use of ink or foil to highlight the embossed area. The change in the dimensional appearance of the material is the only noticeable difference resulting from the embossing. The blind embossing process provides a clean and distinctive or subtle image on paper stock. It is best used to create a subtle impression or low level of attention to the piece, yet provide some slight form of differentiation for the finished work.
Registered Emboss
Registered embossing is a process that places the embossed image in alignment with another element created with ink, foil, punching, or with a second embossed image.
Combination Emboss
Combination embossing is the process of embossing and foil stamping the same image. It involves imprinting and aligning foil over an embossed image to create a foil emboss. A sculptured die, generally made of brass is used for this procedure. The process requires close registration that must be controlled to keep the image and foil matched precisely. The process of embossing and foil stamping is accomplished in one operation with the use of a combination die. The combination die has a cutting edge around the perimeter to cleanly break the excess foil away from the embossed area.
Pastelling
Pastelling is also referred to as tint leaf embossing. It involves the process of using a combination die to provide a subtle antique appearance to a substrate that is embossed and foil stamped. Pearl finishes, clear gloss, or similar pastel foil finishes can be selected that provide a soft two-color antique look (without scorching) to the embossed image. Lighter colored stocks work best to provide this soft contrasting effect.
Glazing
Glazing refers to an embossed area that has a shiny or polished appearance. Most often this process is accomplished with heat that is applied with pressure in order to create a shiny impression on the stock. Dark colored heavy weight stocks generally work best with glazing because the polished effect is much more noticeable and the dark color of the stock helps to eliminate or soften any burned appearance that may result from the application of the heat. When used in conjunction with foil, the process can provide the foil with a slightly brighter appearance.
Scorching
Scorching is similar to glazing except that it is not used to polish the stock. Instead, scorching does what it implies: as the temperature of the die heating plate is increased beyond a normal temperature range, a scorched effect is created in the embossed image, which results in an antique or shaded appearance. It is best to use a lighter colored stock for this procedure in order to provide a unique two-toned appearance. Caution should be used in requesting this effect, since it is easy to burn the stock if too much heat is used. If scorching occurs too close to the printed copy, it can interfere with the clarity of the printed copy; however, this may be the effect that is desired for a particular application.
Designing for Emboss
First rule of designing for emboss: create vector artwork. This means using Illustrator, InDesign or another vector-based software.
When an emboss die is created, film is output and this is used to photo-etch metal. Film has a dpi of about 2,400. And even then, vector lines remain clean when output to film, virtually resolution independent. When you use raster art for creating a die, you’ll end up with a jagged edge in the metal die that has a high chance of cutting through your paper.
So if you’re going to follow one rule, that’s the one to follow.
But beyond that golden rule, there are a few others to keep in mind when using an emboss in your design:
- The larger your embossed area, the deeper it will be. Conversely, the deeper you want your emboss, the larger you’ll have to make the embossed area.
- Foil inherently looks better when it’s embossed. Foil reflects light and its surroundings. By giving it a bevel and edges, you’re catching light in various places across the surface.
- Coupling embossing with artwork (where the art that has depth, shadows and highlights) is almost a waste of time. Your emboss will be lost in the artwork and the artwork may look distorted by the emboss. There’s almost an inverse equation at work—the more complicated your artwork, the simpler your emboss should be. And the more complicated and intricate your emboss design, the simpler your artwork should be. If you have a sculpted die, consider doing a blind emboss or embossing a flat foil area.
- Mixing large areas of emboss with fine detailed embossing using a single level emboss die will mean sacrificing one of the two. Fine detail in an etched die needs very little time to etch. Etching it too long will start to eat away the emboss design. Large areas of emboss need longer to etch in order to get them deep enough. So if you have to mix the two, you’ll likely need a multi-level or sculpted die to get it right. Or work out your design so that the level of emboss detail is consistent across the design.
- If you intend on using a combination foil and emboss die, realize that everything that is embossed will also need to be foiled. This eliminates the possibility of blind embossing or registered embossing (where the emboss is registered to print, not foil).
- Emboss is the last step of finishing your design. The design may go through other steps, such as folding and glueing (for packaging) or binding, for a book cover, but actual finishes end with the emboss. You can’t laminate an embossed surface, you can’t spot gloss or matte an embossed surface. Think with this when creating your design. For example, if you want your piece laminated, you can’t use a combination die as the heat of foiling will melt the laminate.
Preparing Your Artwork
How you prepare your artwork is something you should discuss with your die manufacturer as they have different specifications that they will want you to follow. That said, I’ve never worked with a die manufacturer who didn’t accept vector illustrator files or vector PDFs.
But because embossing is the last step of the finishing process, it’s very important that registration is kept in mind, especially where the emboss will register to the printing. A good solution is to have a registration mark in your emboss artwork that is also repeated on the printed sheet. This needs to be outside of the final crop/cut line of your artwork. Two or three simple “+” marks in your artwork will do the trick—but make sure that they are thick enough that they will visibly emboss.
Some die manufacturers have worked with finishing houses and include drill holes in their dies so that the dies can be easily attached to the stamping press. If you’re making a lot of dies, it’s a good idea to get the drill hole “grid” or layout and put this into your background so that you can make sure you are preparing the artwork with these holes in mind.
References
https://en.wikipedia.org/wiki/Paper_embossing
http://www.bindagraphics.com/pubs/pub39.html







One of the more comprehensive and helpful posts on emboss/deboss, thank you for this. Much appreciated.
Very helpful information. Thank you for sharing!
Brilliant.
Hi,
I may have missed it in the article but how should one prepare a logo file to be made ready for embossing on to a stainless steel (drinking flask/tumbler) surface?
That’s usually done with engraving rather than embossing and you should find out from the manufacturer what kind of file they want.
I’m a crafter and I use commercial embossing folders Is there anything that I can apply to the back of my embossed pages to strengthen the embossing?
In the “Die Style Guide” illustration with the depth microns underneath the embossing, what do the degrees written above the embossing indicate? My best guess was the angle of the shadow used to make the depth apparent.
I believe it’s the angle of the die. A 90 degree angle would mean the die has a straight wall inside (which would most likely cut right through the paper).