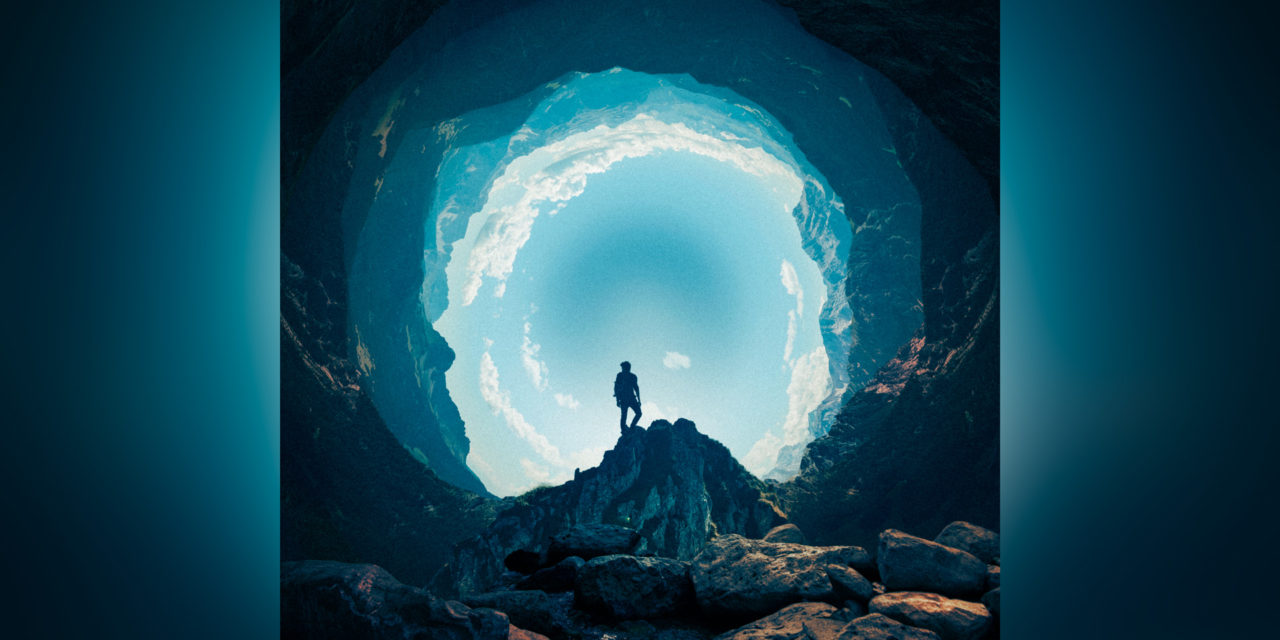
I was inspired by the Photoshop splash screen to create a piece of art using one of the oldest effects in Photoshop—polar coordinates.
Polar Coordinates is an effect that takes a rectangular image and warps it into a circular image. You can also do the opposite, taking a circular image and warping it back into a rectangular image. There are quite a few uses for the tool, although I would guess the most common is in creating environmental maps for 3D programs. This is certainly where I’ve used it the most in the past.
But aside from its 3D applications, you can actually use the tool to make some pretty interesting pieces of art.
The tool is found in the top menu, under FILTER > DISTORT > POLAR COORDINATES.
Here’s a quick step by step for using the tool to the best effect:
- Start with an image that is at a 1:2 or 1:1.7 ratio (in other words, your image should be twice as wide as it is tall). The reason for this is that your image width will be converted to the circumference of your circular image and thus stretch quite a lot. A square image stretched in this fashion will be very obviously stretched.
- If you don’t want a seam where the left and right edges of your rectangular image join (this seam will end up at the top of your circular image), you will need to use clone stamping and other tools to make the image seamless BEFORE doing the Polar Coordinates effect. To do this, I would suggest first writing down your image width, then going to FILTER > OTHER > OFFSET and putting exactly half of your image width as the horizontal offset amount. What this will do is push the “seam” that your Polar Coordinates will create into the middle of your image. When there, you can use Photoshop’s tools to get rid of the seam and then run the OFFSET filter again.
- The top of your image will become the middle of your circular image. Because of this, it’s important that the entire top of your image is one color. A great way to take care of this is make a gradient from the top of your image down as far as you can go. If you are doing a landscape image, I would suggest eye-dropping the top of your sky color and then using the “foreground to transparent” gradient from the top of the image until you reach either your first clouds or the edges of your landscape.
- Once you’ve made the image seamless on the left and right and made the top of your image one color, you will need to make your image square. Don’t CROP the image into a square, instead go to Image Size and turn off the link between width and height so that you can change these independently. Make both the width and height the same (so as to not lose image resolution, I would suggest calculating a pixel amount that’s about in the middle of your current width and height). If your image width is 1000px and your height is 500px, change both values to 750px.
- With your square image, you can now run the Polar Coordinates filter.
If you want to learn more about any of the above steps, you can check out the full tutorial I’ve put together to create the above composite called The Great Abyss.


Hey rikard, i really love your article, I am founder of http://www.toolpic.com Can you write some tutorial on my website, It is photoshop alternative. Let me know thanks 3
I went to the site and get a grey screen.
If you are getting grey screen that meanns you do not have flash player installed… Please see if pixlr/editor can be open in ur browser. If so that means toolpi will also work good on your site.